Dec 24 2012

Le Réveillon

Published by Christine under Uncategorized

Christmas dinner in France is generally Christmas Eve dinner, aka le réveillon* de Noël. People gather for the holiday feast on the 24th, and typically eat rather late (a 10 or 11 p.m. start time is fairly standard). Children eagerly await the arrival of le Père Noël (Father Christmas) at midnight. This might happen while the family is at church for midnight mass, as is customary for some, or it might happen (miraculously) while they are not watching and enjoying dessert. Either way, le Père Noël shows up and leaves before you’ve had a chance to catch a glimpse of him, the rascally old man.

I grew up in an apartment building in the town of Bagneux, about two-miles south of the Porte d’Orléans, one of the main entry points to Paris. Our apartment was small, and to this day I marvel at how my parents managed to keep our presents stashed out of sight before the big day. It was, however, quite a bit harder to place the gifts under the Christmas tree at the right time, and so my parents and older sisters had a perfect system in place which worked for years: a few minutes before midnight, one of them would stand by the window and say something to the effect of just having heard sleigh bells, and that we should rush downstairs to the lobby to try and catch a glimpse of the man in red. Needless to say, we missed him every time, just by a few seconds, and by the time we came back upstairs, the gifts were under the tree, dropped off, it was said, by a big man in a hurry to deliver more presents to other children. He simply could not stay to say hi, not even for a couple of minutes. Père Noël, if you’re reading this: I’ll be waiting tonight with a bunch of guests, and maybe this time we can talk a bit, alright?

Tonight is the third réveillon in a row I will be hosting for friends and family. Somehow, there will be twenty of us at the table(s), somewhat more than in past years, which is both wonderful and mildly overwhelming. On the menu, few typically French touches, save for some smoked salmon canapés that I will serve as amuse-bouches along with some festive bubbles in a glass. In my family, it was customary to begin the meal with a course of raw oysters on the half-shell, followed by some foie gras with a glass of Sauternes; few of my American friends delight in such, however, and so I tend to cater to a more prudent – and vegetarian for some – palate. This year, the menu will include a turkey, a mushroom lasagna al forno (for the non meat-eaters), chestnut and apricot stuffing, some yet-to-be-decided-upon spinach, roasted tomatoes, braised cabbage and apples, gratin dauphinois (potatoes never had it this good) and for dessert, a blueberry trifle. No pictures to share yet, but I will report later on, I promise.

And so the cook-athon begins this morning in earnest (to be honest, I already did some prep work yesterday), and before I begin assembling, whipping, baking and slicing, let me wish all those who celebrate it a magical and merry Christmas, and more generally to all: may this holiday season brings you joy, peace, and delightful meals!


* The word is derived from the word “veille,” which means “eve”. The other French réveillon takes place on December 31: le réveillon du nouvel an.

2 responses so far

Nov 25 2012

Sugar Cookies

Published by Christine under Sweets

A quick note today for an easy, fast and delicious sugar cookie recipe, courtesy of my daughter, Cookie Chef Deluxe in our house. This is the kind of roll-out cookie dough I like, because it’s versatile (flavor it any which way you want) and does not need refrigeration – which means you can be savoring warm, sweet, buttery treats in 45 minutes or less, from the time you start taking your ingredients out of the fridge. If you have young children, this is the ideal cookie to make with them: few ingredients, simple instructions, and near instant gratification.

It's Christmas time!


Sugar Cookies

1 cup butter (2 sticks, room temperature*)
1 cup sugar
1 large egg
2.75 cups all-purpose flour
2 tsp baking powder
1 tsp vanilla extract, or
zest of one lemon, finely chopped or
1 tsp almond extract or
2 tsp amaretto or … (you get the idea)

*If your butter is not at room temperature, soften it in the microwave by zapping it for 5 to 10 seconds at a time until it starts to give a little when you press on it.

Preheat oven to 400 degrees.

Cream together the butter and sugar (in a stand mixer is best) until light and fluffy. Beat in the egg and whatever flavoring you are using.

Mix together the flour and baking powder, and add to the butter mixture, one cup at a time. When it’s all blended together, the dough is ready to use. No need to chill it – it will be stiff enough to roll out.

On a well-floured surface, roll out 1/2 of the dough to about 1/8″ thick. Use your favorite cookie cutters to make some fun shapes and bake until the cookies begin to turn light brown on the edges, 8 to 10 minutes. Remove from baking sheet promptly and cool on a rack.

Decorate (or not – we like ours undressed) and enjoy!


No responses yet

Oct 13 2012

Ready, Set…

Published by Christine under Breads

Start(er). Wild yeast starter, to be precise. And what would that be? I’m so glad you asked.

In my last post, I wrote about bread-making, and the wonderfully easy no-knead method that Jim Lahey of Sullivan St. Bakery unleashed upon the world in 2006. The recipe is simple enough for a 4-year-old to make (although I find there’s seldom a 4-year-old around when I need one), and consists of flour, salt, water (or other liquid) and yeast. The latter is the reason for today’s post. You can easily enough buy very good commercial yeast that will result in excellent bread. However, if you want to take your bread up to the next level of awesome (who wouldn’t?), all it takes is substituting the yeast with your very own homemade wild yeast – aka sourdough – starter.

Yeast spores exist in your kitchen and in the whole grain flour you buy. Making a starter is simply a matter of waking up those spores and feeding them in the right environment, giving them a chance to multiply and grow into a starter that can last a lifetime (and beyond). This is no hyperbole, by the way. I’ve heard of people with starters they inherited from their parents, starters that were made in the 1940s and even before that, still alive and used today. The aforementioned Jim Lahey told me he has had his own starter since the early 90s. A starter is easy to keep alive if you feed it regularly with flour and water, and it will work for as long as it lives. Think about it: you could begin something now that your grandchildren might use some day, and each time they eat bread made with the starter you created, they will be reminded of you. I can’t think of a better legacy. (Personal note to my children: there is no money under the mattress, but there will be starter in the fridge; use it in good health.)

If you trust what you read online (grain of salt, anyone?) a sourdough starter can be a bit of a challenge to make. The conditions created during the early stages can be ideal not only for the growth of yeast spores, but also for the leuconostoc bacterium, which exists in flour as well. So I looked around some more, and it turns out that leuconostoc strives in a much less acidic environment than that optimal for yeast spores growth. Knowing this, Peter Reinheart (another top bread baker) promoted the “pineapple juice solution,” which provides just the amount of citric acid that’s good for the yeast and bad for the bacteria: problem solved.

Making this starter is a multi-day process. The work involved is negligible, but you must be patient, obviously. And now, for something not different at all, the process (with pictures! in color!):

Step One:

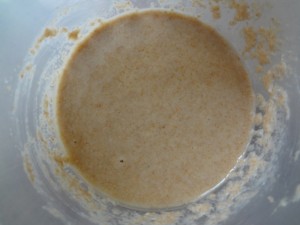
In a pint-sized container, mix together 3.5 Tbsp whole wheat or rye flour (I used King Arthur’s organic whole wheat) and 1/4 cup of no sugar added pineapple juice. Blend well and cover. Let it sit for 48 hrs at room temperature. About 2 or 3 times a day, open the container and mix well.

After the first 48 hours, you will not see very much activity. Proceed with step two nonetheless.

Step Two:

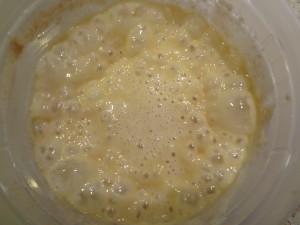
Add 2 Tbsp whole wheat or rye flour and 2 Tbsp pineapple juice. Blend well, cover and let that sit for another 48 hrs, stirring vigorously 2 or 3 times daily.

Not very clear from the picture, but at this point, you will start to see some tiny bubbles forming on the surface. This is good news! Move to step three.

Step Three:

Add 5 Tbsp all purpose flour and 3 Tbsp spring water to the mix. Blend well, cover and let this sit for 24 hours.

After the 24-hr waiting period, the starter is looking very healthy and lively. One last feeding, and it will be ready!

Step Four:

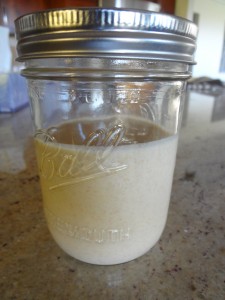
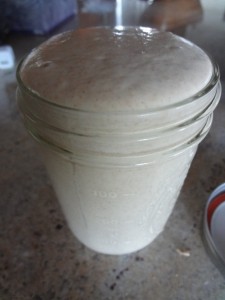
Transfer to a larger (preferably glass) container, and add 1/2 cup all purpose flour and 1/4 cup spring water. Let it sit at room temperature for a few hours, until it has doubled in size, then stir it down and place in the refrigerator. It is now ready to use.

Right after the last feeding...

... and a couple of hours later; I think it's telling me it's ready for some bread action!

Step Five:

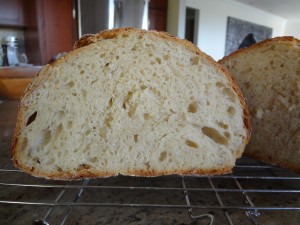
Make some no-knead bread. I used 1/4 cup of my new starter instead of yeast, and whisked it in the water before mixing with the flour (I used all white flour this time). This is the result:

I think we can all agree it came out spectacularly well.

I don't know about you, but I'm definitely ready for some of that.

Note: to keep your starter alive and healthy, even if you are not using it all that often, remove about 1/4 cup of the starter once or twice a week, and replace that with fresh flour and water (about 3 Tbsp flour to 1.5 Tbsp water). It will keep fresh for years as long as you remember to feed it.


2 responses so far

« Prev - Next »