Oct 13 2012
Ready, Set…
Start(er). Wild yeast starter, to be precise. And what would that be? I’m so glad you asked.
In my last post, I wrote about bread-making, and the wonderfully easy no-knead method that Jim Lahey of Sullivan St. Bakery unleashed upon the world in 2006. The recipe is simple enough for a 4-year-old to make (although I find there’s seldom a 4-year-old around when I need one), and consists of flour, salt, water (or other liquid) and yeast. The latter is the reason for today’s post. You can easily enough buy very good commercial yeast that will result in excellent bread. However, if you want to take your bread up to the next level of awesome (who wouldn’t?), all it takes is substituting the yeast with your very own homemade wild yeast – aka sourdough – starter.
Yeast spores exist in your kitchen and in the whole grain flour you buy. Making a starter is simply a matter of waking up those spores and feeding them in the right environment, giving them a chance to multiply and grow into a starter that can last a lifetime (and beyond). This is no hyperbole, by the way. I’ve heard of people with starters they inherited from their parents, starters that were made in the 1940s and even before that, still alive and used today. The aforementioned Jim Lahey told me he has had his own starter since the early 90s. A starter is easy to keep alive if you feed it regularly with flour and water, and it will work for as long as it lives. Think about it: you could begin something now that your grandchildren might use some day, and each time they eat bread made with the starter you created, they will be reminded of you. I can’t think of a better legacy. (Personal note to my children: there is no money under the mattress, but there will be starter in the fridge; use it in good health.)
If you trust what you read online (grain of salt, anyone?) a sourdough starter can be a bit of a challenge to make. The conditions created during the early stages can be ideal not only for the growth of yeast spores, but also for the leuconostoc bacterium, which exists in flour as well. So I looked around some more, and it turns out that leuconostoc strives in a much less acidic environment than that optimal for yeast spores growth. Knowing this, Peter Reinheart (another top bread baker) promoted the “pineapple juice solution,” which provides just the amount of citric acid that’s good for the yeast and bad for the bacteria: problem solved.
Making this starter is a multi-day process. The work involved is negligible, but you must be patient, obviously. And now, for something not different at all, the process (with pictures! in color!):
Step One:
In a pint-sized container, mix together 3.5 Tbsp whole wheat or rye flour (I used King Arthur’s organic whole wheat) and 1/4 cup of no sugar added pineapple juice. Blend well and cover. Let it sit for 48 hrs at room temperature. About 2 or 3 times a day, open the container and mix well.
Step Two:
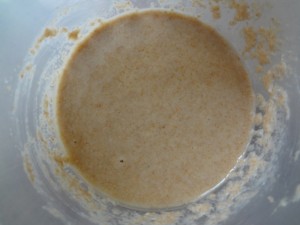
Add 2 Tbsp whole wheat or rye flour and 2 Tbsp pineapple juice. Blend well, cover and let that sit for another 48 hrs, stirring vigorously 2 or 3 times daily.

Not very clear from the picture, but at this point, you will start to see some tiny bubbles forming on the surface. This is good news! Move to step three.
Step Three:
Add 5 Tbsp all purpose flour and 3 Tbsp spring water to the mix. Blend well, cover and let this sit for 24 hours.
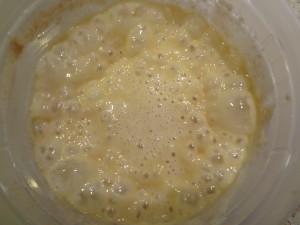
After the 24-hr waiting period, the starter is looking very healthy and lively. One last feeding, and it will be ready!
Step Four:
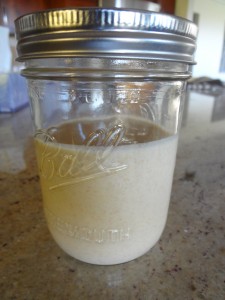
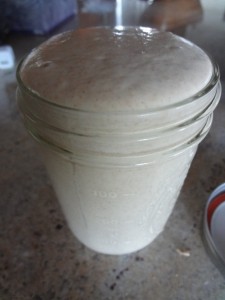
Transfer to a larger (preferably glass) container, and add 1/2 cup all purpose flour and 1/4 cup spring water. Let it sit at room temperature for a few hours, until it has doubled in size, then stir it down and place in the refrigerator. It is now ready to use.
Step Five:
Make some no-knead bread. I used 1/4 cup of my new starter instead of yeast, and whisked it in the water before mixing with the flour (I used all white flour this time). This is the result:
Note: to keep your starter alive and healthy, even if you are not using it all that often, remove about 1/4 cup of the starter once or twice a week, and replace that with fresh flour and water (about 3 Tbsp flour to 1.5 Tbsp water). It will keep fresh for years as long as you remember to feed it.


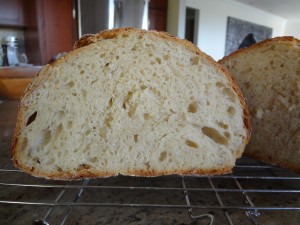

Damn, that’s beautiful.
I would make my own starter, but I’m lucky I remember to feed myself.
Thank you! It’s really not a very demanding house guest, you know. Even if you forgot about it for a little while, just some flour and water would revive it. And the bread tastes SO good with it.