Oct 01 2012
Good Company
This past Saturday evening, we went to my favorite local vegetable grower for the monthly farm dinner he organizes there. Chefs from some of the best NYC restaurants come up to the Hudson Valley to cook in the wonderfully rustic, relaxed and über-friendly atmosphere of the farm. We were celebrating my birthday, and were fortunate enough to have Jim Lahey as the man behind the stove that day. We enjoyed grilled bread with mushrooms, telaggio, and Delicata squash, lightly drizzled with chili oil (perfection – I simply must make that at home); a salad of mixed greens with a refreshing citrus dressing; a goat’s milk yogurt raita with carrots and cranberry, served with a lightly charred, soft and delicious flat bread; Cuban peppers and patty pan squash stuffed with a mixture of onions, carrots, celery, corn, and ginger; and for dessert, an apple crumble that had just the right amount of caramelized sweetness. Both Jim and Guy Jones (farmer extraordinaire) punctuated the meal with commentary on the ingredients, the dishes, and their own history. Needless to say, all had a great evening there.
Jim is the owner of Sullivan St. Bakery and Co. (pronounced ‘company’), both in New York City. He is to be thanked for the biggest revolution ever to come to bread baking since anyone thought of mixing flour and water and throwing that on the fire: the no-knead bread recipe. This is just as it sounds: briefly mix flour (any), water (beer, whey, whatever), yeast, and salt; let it sit for 12 to 18 hours without so much as a thought; bake; eat; go ‘ahhhhhhhhhh’. Rinse and repeat as often as possible.
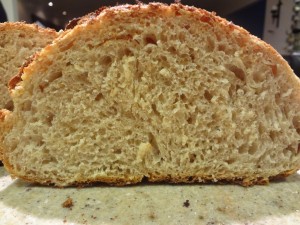
Back in 2006, Mark Bittman published Jim’s recipe in the New York Times, and since then, things haven’t been the same for many of us. The very idea that you could make bread effortlessly ran so contrary to what bread lovers and bakers had always known – namely, that it was an arduous if rewarding process – that I remember reading the recipe with a good dose of disbelief (my maiden name is Thomas, after all). I became a convert immediately after my first batch, when I cut into that golden loaf of noisily crusty, airy, fragrant bread. It’s food porn at its best. Unless you live near Jim’s bakery (and I don’t), you would have a hard time getting better bread than this anywhere in this country.
At the time, the food blogosphere went haywire. Everyone talked about it, raved about it,* baked up a storm and seemingly stopped eating anything but bread. Things have largely quieted down since then, and because not everyone is as interested in cooking as I am, it appears that a good majority of people are still unaware that they can easily make the best bread they’ll ever eat right at home. I’m hoping this post reaches some bread-baking virgins out there and makes them want to try. In this way, we can all continue the revolution.
Viva!
* Actually, not everyone was an immediate convert.
No Knead for Speed Bread
adapted from Jim Lahey’s No-Knead Bread recipe
While the basic idea behind the original recipe remains unchanged, what I am sharing with you here is what I have found works best for me. I have tweaked a few things here and there which reflect both my tastes and my experience with the baking process. I refer you to Mark Bittman’s article (see link above) for the original recipe – there is also a video of the process linked to that article.
Ingredients:
2.5 cups AP flour
0.5 cup rye flour
1.5 tsp sea salt
1/4 tsp instant yeast (or 1/4 cup sourdough starter, if you have any)
1.25 cups whey or water, room temperature
Begin the process the day before you plan to make the bread. I typically mix the dough before I go to bed at night, and bake it when I get home from work.
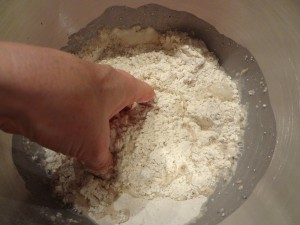
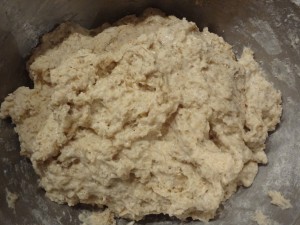
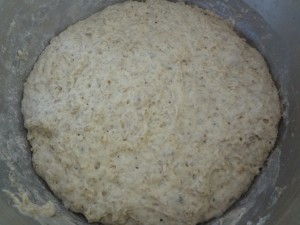
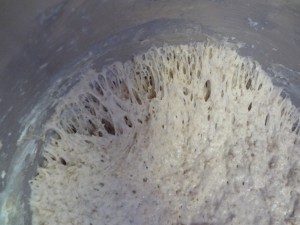
In a large bowl, mix all ingredients with your hand until it resembles a shaggy mass. The dough will be wet (but not liquidy) and sticky. That is just what you want. Cover the bowl with an inverted dinner plate and let it rest in a warm room for 12 to 18 hours. It will be ready when it is covered in small bubbles. After this first, long waiting period, your dough will have risen quite a bit, and a lot of stringy gluten will have developed. This is what will ultimately make your bread the envy of the neighborhood – all of this for about 3 minutes of actual work; not bad.
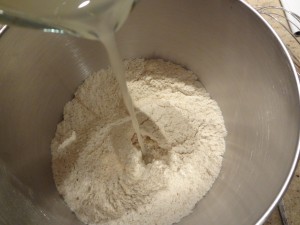
I like using whey (the by-product of cheese making) instead of water; it adds just a little bit of tang to the bread, somewhat akin to sourdough.
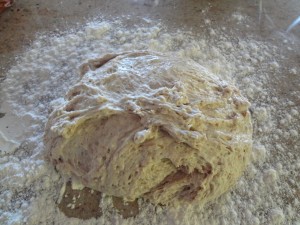
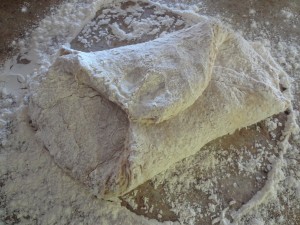
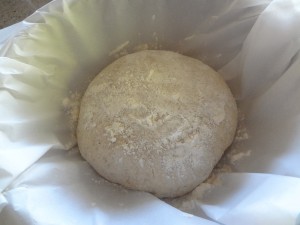
The next day, line another, smaller bowl with parchment paper. When the dough is ready, pour it out on a well-floured surface. With floured hands, pat it down a bit and fold it into a loose square. Working quickly, turn it over and shape it into a ball, then plop it into the parchment-lined bowl. The entire shaping process should take no more than 5 minutes, including cleaning time. Sprinkle more flour on top of the dough, cover loosely with a dish cloth or plastic wrap, and let it rise about 60 to 90 minutes. You might not notice very much of a rise at this point, but that is fine.
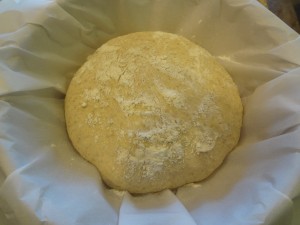
This is the dough after a 75 min. rest. Not very much change, but it's ready. The heat of the oven will make it bloom.
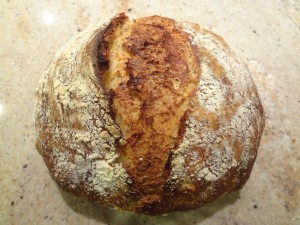
Approximately 40 minutes before you are ready to bake, place a 3 to 6 qt Dutch oven (ceramic, enameled cast-iron, or glass will not matter, as long as it has a cover with a knob that can withstand very high temperatures) in the oven, and preheat to 450F (this is important). When the oven and your cooking vessel are both blazing hot, take the cover off, place the loaf (parchment paper included) in the dish, make a quick cut across the loaf with a sharp knife, place the cover back on top and close the oven. Let the bread bake, covered, for 30 minutes. Uncover it, and let it bake for another 15 to 20 minutes. When it is done (it will look and smell like heaven), remove from the oven and let it cool on a rack for at least 45 minutes before you slice into it. The waiting is probably the hardest part.
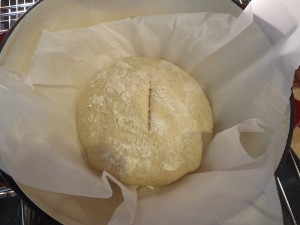
Place the dough, parchment paper and all, in the hot Dutch oven. Don't forget to cover; the wet dough will create its own steam and yield the most wonderful crust.



I think the addition of some rye flour will definitely make this taste better. Also, the whey: where do you get yours? Are you making cheese now too?
I’m glad you made some of this – isn’t it the easiest thing? The rye flour definitely gives it more oomph. I keep the whey I get when I make fromage blanc – another no-brainer; it is similar to (but better tasting than) Greek yogurt. I put it in small containers and freeze it.
I am a bread virgin and you have inspired me to try this week! Thank you!
I promise it won’t hurt at all.
Yum!! What is AP flour?
Hi Jae! It means all-purpose flour – sorry for the shorthand!