Jul 13 2012

What Rhymes With Yum?

Published by Christine under Sweets

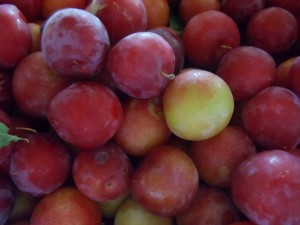
If it’s July, it’s got to be plum. Lots of them. You might actually call it a bumper crop; not quite as bumper-y as the one from 2010, which yielded about 60 lbs for the 1 (one) plum tree in our yard, but still. I’m not exactly sure which variety they are, but they are small, and rosy-red, and extremely juicy (as in: you-might-want-to-protect-yourself-before-biting-into-one-if-you-really-like-that-shirt-you’re-wearing juicy), and sweet. They are a perfect summer fruit, and I just had to do something with them – although in all fairness, the squirrels were doing a fine job of taking care of those plums. But I digress.

Plentiful and delicious

And so a decision was made that there would be plum jam, plum butter, plum ice-cream, and plum vodka (thanks to our cousin Stacy for that last suggestion). I would have liked to make chutney and other various condiments, but the plums I have are really too juicy and fall apart so easily that this was not an option. I’ll focus on the jam making today, but worry not, other recipes will soon follow.

Making jam is the easiest way to deal with an abundance of fruit. I remember my mother and her mother making assorted jams and jellies every summer, using fruit from the garden (never from the store), and this is how I learned. The best part of jam-making (other than eating the jam itself, obviously) is how good it makes the whole house smell, and the feeling you get from making something you know will remind you of warm days when the weather turns cold and gray.

Plums are a particularly good fruit to turn into jam, because they do not need very much coaxing to jell, i.e. to acquire that nice, spreadable consistency. You do have to add a little pectin to the batch, but – at least in the case of the plums I used – not very much. Because the skins on the plums can turn rater gummy if they cook in sugar, I recommend skinning the plums. The easiest way to do this is to plunge them first in boiling water, followed by a quick ice bath after 30 seconds or so in the hot water; the skins will slip right off. In my case, the plums were so ready to fall apart that I could neither skin nor pit them (something else you need to do). I had to cook them and (after they fell apart) wait for the skins and pits to rise to the surface – it was all fairly easy to remove from the pot after that.

Depending on the natural sweetness of your fruit, you will need to add anywhere between 70% and 85% of the weight of the plums in sugar in order to make jam. Recipes often call for equal weights of sugar and fruit, but I find that this generally tends to yield a jam that is more akin to a spoonful of sugar than to a spoonful of fruit, which defeats the purpose. You can also add flavorings to your jam: I find that vanilla works very well with plum (merci, Papa!), as does Grand Marnier. If you choose to add a liqueur, do so at the very end, after you have turned off the heat, so the liqueur does not burn and lose its character; do be careful as you add it in, as it will tend to bubble vigorously in the hot jam and splatter a bit.


Plum Jam with Grand Marnier


6 lbs prepared plums (any juicy variety; skins and pits removed; cut in small pieces)
4.5 lbs sugar
6 or 7 Tbsp powdered pectin
1 shot glass of Grand Marnier (optional)

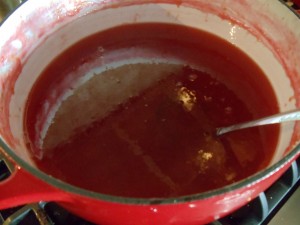
Place plums in a large Dutch oven with a heavy bottom, over medium-low heat. Add 3 to 4 oz of water to the pan if your plums are not very juicy. Mine were, so I did not have to do this as they rendered a lot of liquid. Bring to a full boil and let cook until the fruit begins to fall apart (I would say around 15 min or so, but you might need more time). The plums I used fell apart so easily the jam I made is more or less like jelly – no chunks left in there at all.

Mix the pectin with about half of the sugar and add to fruit. Mix well. Add the rest of the sugar and mix well. Bring back to a boil. The mixture should not boil too quickly. The fruit and sugar will produce some foam at the edges of the pot. You should remove this with a slotted spoon or it will cloud your jam.

Cook the jam until it reaches the right consistency. You will know it’s right by putting a spoonful of the mixture on a plate and in the fridge. After a couple of minutes, the jam will have cooled. If it is too thin, let it cook a while longer and/or add a little more pectin (be sure to whisk it in or it will clump). If it looks set, turn off the heat. Add liqueur at this point, if desired.

Ready to put in jars

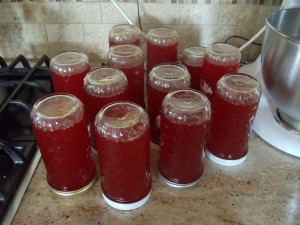
Make sure your jars are sterilized before filling them (putting them through the dishwasher will take care of that). Boil lids and rings just before using, and leave them in the hot water until ready to use. Lids are not reusable, but rings are. Fill the jars carefully – the jam is extremely hot at this point, and you don’t want to scald yourself. Make sure you wipe the rims very clean with a wet paper towel before putting the lid and ring on. Tighten very well and invert the jar on the counter. Let cool in this inverted position. This will ensure a tight seal, and prevent spoilage of your jam.

Upside down (boy you turn me, inside out, and round and round)

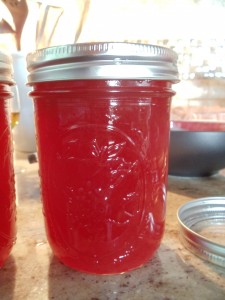
You will know the seal is tight by checking the center of the lid when the jar is cool: if it is sunk, it worked and you can keep the jam for months in a cool, dark place; if it is raised and you can push it up and down, it did not seal properly – you can still eat the jam, but you should refrigerate it and consume it within a month or so (which should not be hard to do).

Pretty in Pink

Up next: Plum ice cream and other delights. Stay tuned.

One response so far

Apr 12 2012

Let’s Eat Again

Published by Christine under Fish,Poultry

Last weekend was a whirlwind of cooking and feasting, what with all these holidays one right after the other – so much happy making. My beloved family and friends kept asking me when (oh when) I would start food writing again, so I thought now would be a good time to let the writing bug do what it does best: it bit. I write.

Easter was celebrated, as has become customary over the past few years, at my friend Mary’s house. The menu for that feast included a succulent leg of lamb, barbecued to perfection, as well as a light and lively cauliflower and leek soup, vichyssoise-style (i.e. cold) – I will surely be revisiting that one sometime soon and share the recipe. That’s how good it was, and I’m hungry at the thought.

Passover’s second seder was my responsibility, for the second year in a row, and I had a really grand time coming up with the menu, because it typically includes a couple of main dishes and an array of starters and sides. It’s definitely a meal that is built for a special occasion, one that takes many hours to put together, but the satisfaction of bringing together friends and family to enjoy a true holiday feast is, in my book, worth every bit of work. Would I do this more than once a year? Probably not. However, many of the dishes in this menu can be made separately at any other time, and really deserve to be revisited outside of the seder. They all need to be made ahead of time, which is one of the reasons they are so well-suited for a large get together.

You can view the menu here: Passover dinner menu 2012


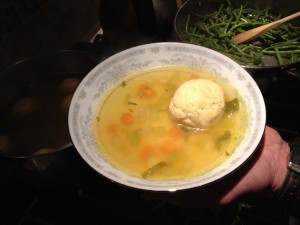
Vegetable soup with matzo ball


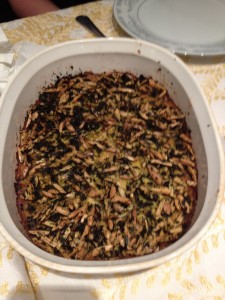
Cauliflower and leek kugel: de-li-cious.


That kugel recipe is really easy and wonderful, and definitely one I will make again. You can find it at epicurious.com.


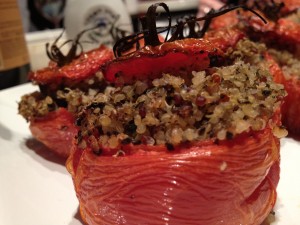
Tomato stuffed with quinoa, zucchini and mushrooms


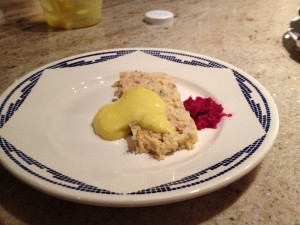
The first dish I would truly recommend you try and make is the sea bass and salmon terrine with garlic aioli; it would be lovely for a light lunch. It’s essentially a delicious gefilte fish. Notice the words “delicious” and “gefilte fish” used in the same phrase? You’re not likely to see that ever again, but I promise it’s true. Everyone raved about how good it was, and I can say this since the recipe is not mine. I found it on Martha Stewart’s web site. Her recipe uses halibut instead of sea bass, but since I was foiled once again in my attempt to buy halibut, I had to substitute. I do not know how the original tastes, but I think I can safely say that the sea bass did not hurt my rendition of this dish one bit.


Not your mother's gefilte fish


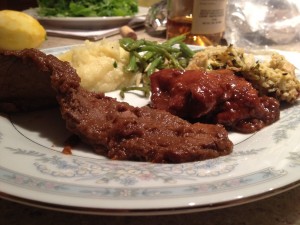
The brisket was another big hit (and one for which I also hold no claim since I took the recipe from another website). The sauce is really what makes it: a wine sauce not so much enriched as it is gloriously highjacked by three pounds of onions and some orange juice. It must cook for 4-5 hours and rest overnight before it can be enjoyed, but the preparation time is really minimal. It is a recipe really worth trying, particularly if, like me, you eat meat rather infrequently; this makes the occasion a special one. It also makes the house smell like heaven.


Still life with brisket


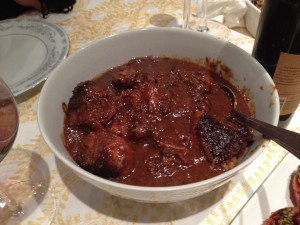
Last, but not least, is the chicken with pomegranate and walnut sauce. This recipe was given to me by my sister Brigitte, who makes it once or twice a year. It is a traditional Iranian recipe which she typically makes with duck instead of chicken. The magic of this dish is also in the sauce: made with pomegranate molasses and ground walnuts, it must cook for several hours before it acquires a gorgeous, glossy, chocolate-brown finish with just enough tartness to jazz up the chicken. It is a rich, beautiful and festive dish which deserves every bit of your attention.

And so I say let’s eat again, and again.

Welcome back to The Flex.


Chicken with pomegranate and walnut sauce
Khoresht Fesenjan


1 whole chicken, quartered and skinned (or chicken pieces)
a large onion
1/2 tsp cinnamon
1 10-oz bottle pomegranate molasses
10 to 12 oz ground walnuts
2 cups water
salt and pepper to taste
sugar to taste

Chop and sauté the onion lightly in some olive or peanut oil, until soft. Add cinnamon and cook until fragrant. Add water, walnuts, some salt and pepper and mix well. Add molasses and 2 tsp sugar and mix well. Bring to a boil, then lower heat to simmer and add chicken. When chicken is done (time will vary depending on the size of your pieces), remove it from the sauce and set aside. Let the sauce simmer gently for 2 1/2 to 3 hours. Occasionally give it a stir and taste for seasoning. When the sauce is done, it will be glossy and chocolate colored, and taste tart, but not overly so. Add a little more sugar as needed.

Let rest overnight. Before reheating, skim fat off the top of the sauce, and place chicken pieces back in.


You might need a little extra time at the gym to work this one out, but it is entirely worth it.


Serve with basmati rice and a light, dry white wine, such as pinot grigio.


One response so far

Dec 18 2011

On The To Do List

Published by Christine under News Bites

Over the Christmas break, I will try to make time to watch some of Michael Pollan’s Edible Education 101 videos, compiled from his Berkeley U. class. You can read about it in this article in The Atlantic.

For those who don’t know him, Michael Pollan is a journalism professor who holds more than a passing interest in the philosophy of food, and whose motto “Eat food. Not too much. Mostly plants.” has become a rallying cry for flexitarians and proponents of the Slow Food movement.

Coming soon on The Flex: a digital story about a family tradition. Stay tuned…

No responses yet

« Prev - Next »