Jul 29 2012
Raspberry Tart
Summer is here, and it has been inspiring me to cook with fruit. Lots of them. I’ve been (very) busy with plums, peaches and blueberries. As I was trying to decide what fruity dessert I should bring to our friends’ barbecue recently, I settled on raspberries as the winner for this lottery.
I wanted to make a fruit tart, that lovely French assemblage of a cookie-like crust, pastry cream, and glossy fruit. The crust and cream are already quite sweet, and so the choice of topping must be made carefully. Any kind of berry works well, because they are inherently tangy. Raspberries are abundant right now, and happen to be my favorite (in a tie with a perfectly ripe strawberry).
This should have been (are your speakers on?):
Yes. Making this tart turned out to be slightly more complicated than I had originally bargained for. Now, I will admit to not being a baker – I have a hard time following exact directions, which great baking requires, so I tend to stay away from complex pastries – but I really thought this would be a no-brainer. Ha!
Let us begin with the crust. There are a few basic types of pie crusts out there: pâte brisée, pâte sucrée, and pâte sablée. I’m leaving out pâte feuilletée (puff pastry) from the lot, because its preparation and use are quite separate from the rest. Pâte brisée is the crust typically used for making quiches and other savory or sweet pies. It’s primarily composed of flour, some type of fat, and water (I have a good recipe here). Both pâte sucrée and pâte sablée contain eggs and sugar, but differ in their making: in pâte sucrée, the butter is creamed with the sugar and eggs before being incorporated with the flour; in pâte sablée, the butter is incorporated to the flour by rubbing both together until the mixture resembles bread crumbs or sand (sable means sand in French), and then adding the sugar and eggs. Pâte sablée crumbles a little more readily, and it is that cookie-like texture that I was after for my tart.
I looked at a number of recipes before settling on one which promised success because it was “tested” and therefore presumably fail-proof (right? Right?). The amount of sugar in the dough (1/4 cup for 1.5 cup of flour) should have given me pause, but heck, I’m a kitchen warrior, and nothing really scares me. Well, gentle reader, it should have. Not only is that amount of sugar a guarantee that you will never be able to roll out that sticky mess of a dough, no matter how long you let it sit in the fridge, it is also a guarantee that, once you have somehow managed to mold it inside your &%$! tart pan (and I measure my words), the sides will collapse in the heat of the oven, like a sand castle on the beach at high tide, leaving you with nothing more than a fat cookie. Curses.
Take two. This time, it’s for real. I found a recipe that called for minimal sugar and lemon zest – a winner right out of the gate, since lemon and raspberries complement each other very well. It was not the easiest dough to handle, but it was at least manageable, and easy to patch together in the places where it tore, because it’s very soft. Since the filling for the tart is prepared separately, the crust must be blind-baked, that is, cooked without a filling. This is done by placing parchment paper with pie weights (or beans) in the pan on top of the crust before putting it in the oven to bake. Once the crust is baked and cooled, it can be filled – in this case, with pastry cream and fruit.
On to the pastry cream, for which I trusted none other than Julia Child. Her crème patissière is classically made, with creamed sugar and eggs, hot milk and flour, and cooked for a few minutes to get rid of the raw flour taste. It holds itself together quite well (you need something with a lot of body in a fruit tart, so the filling doesn’t fall apart when you cut out the first slice). I flavored it with amaretto, which I think is one of the best flavor companions to raspberries. My only gripe with the recipe is that it is too sweet. The next time, I will reduce the amount of sugar from 1 cup to 3/4 cup, which should still be plenty enough – I might have to increase the amount of flour slightly, to compensate for the loss.
The last thing to do is placing the fruit on top of the pastry cream-filled crust: a simple task, made only slightly more challenging by the final brushing with a liquid jam glaze, which requires a light and nimble hand, in order to preserve those delicate raspberries.
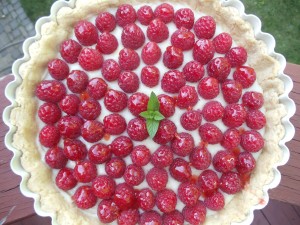
In the end, while it was more of a challenge than I anticipated, I am still pleased with the result:
Raspberry Tart
For the crust:
1 3/4 cup flour
10 Tbsp cold butter (cut in 10 pieces)
1 to 2 Tbsp sugar (just remember: the more you use, the harder the dough is to handle)
a pinch of salt
1 large egg (or two egg yolks)
1 Tbsp water
zest of one lemon
1 Tbsp fruit jam (apricot, raspberry or plum work well)
For the crème patissière
2 cups milk
5 egg yolks
1 cup sugar (see blog note)
1/2 cup flour (see blog note)
2 Tbsp amaretto (or 2 tsp vanilla extract)
1 Tbsp butter
For the topping
1 pint fresh raspberries (you cannot really use frozen for this recipe)
2 to 3 Tbsp apricot, raspberry or other fruit jam (I used plum)
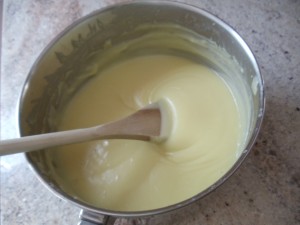
Step 1, the crème patissière: ideally, you will make this the day before – or at least, the morning of. First, bring the milk to a boil. While you do this, beat the egg yolks and the sugar on high speed until the mixture turns a pale yellow and the sugar is no longer visible. Very slowly beat the hot milk into the egg mixture – add only a trickle of milk at first, more as you progress. You are trying to warm up the eggs without cooking them. This is called tempering.
Beat in the flour and flavoring, then pour back in the pan and return to the stove. Bring back to a boil, stirring the entire time; you need to make sure the crème is not scorching at the bottom. Boil for about 3 minutes, mixing constantly. The crème will be thick like pudding; it will thicken even more as it cools. While still hot, mix in the butter. Place in a container and cover with a plastic film to prevent the formation of a skin. When cool, refrigerate for at least 2 hours or overnight.
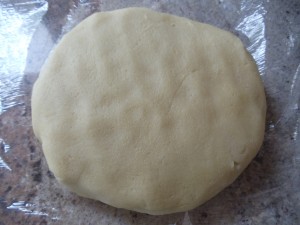
Step 2, the dough: in a food processor, pulse together flour, salt and butter. When blended, add sugar and lemon zest, and pulse for a few seconds. Add egg and water, and process until the dough comes together in a ball (about 30 sec.). Gather into a ball and flatten in a disk shape. Wrap in plastic and refrigerate for about 30 min.
Roll the dough out on a well-floured surface, and place in an 8- to 9-inch tart pan with a removable bottom. If the dough tears, as will likely happen, just patch it up with leftover bits. It will still come out pretty in the end. Put the dough back in the fridge for about 15 minutes. During this time, preheat your oven to F375.
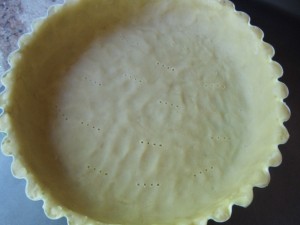
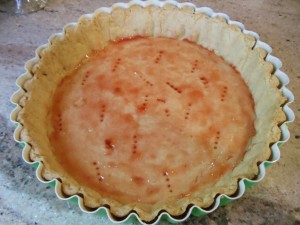
Before baking, do the following: prick the bottom of the crust with a fork, to prevent bubbling, like this:
Next, place a sheet of parchment paper, filled with pie weights or beans, on the crust. Place your tart pan on a cookie sheet (this will make it easier to take in and out) and into the oven. Bake for about 15 min. with the pie weights, then remove those and bake for an additional 8 min. or so, until the crust is done (the sides with have turned color).
When the crust is cool, brush the bottom with a little bit of fruit jam, to seal it. This way, it will not turn soggy when you put the filling in.
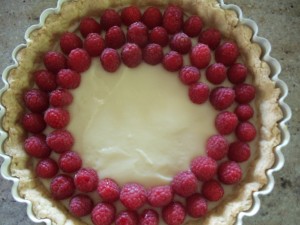
Step 3, assembling the tart: spread the crème patissière on the tart crust. Place raspberries on the filling in concentric circles, like this:
Warm up the jam for a few seconds in the microwave to liquefy it. Then gently brush it on the berries to give them that glossy, pastry shop finish. A few mint leaves in the center for a little color contrast, and you’re done!

Shiny berries on crème patissière laced with amaretto on top of a sweet, lemon-favored crust; not a bad day at the office.


